Upgrading my Wi-Fi network
January 31, 2026
The first step in improving my home network had to be fixing my dreadful Wi-Fi setup. My ISP-provided router was nowhere near powerful enough to reach the back end of my house, let alone the garden or the home office.
In a previous apartment, I had used a basic mesh system for a similar reason: the apartment was long and narrow, and the Wi-Fi didn’t really reach the far end, so I used a simple mesh system to boost the signal to the other end of the house. There are two types of mesh: the simplest, most “plug and play” versions are basically just signal relay systems. They don’t need ethernet connections, and so long as you place each one within the range of the next one, you can get a half-decent mesh purely through Wi-Fi, without worrying about running Ethernet cables through your house.
I wanted a much more robust system though, and my research led me to “wired Ethernet backhaul” as being the best way to implement a mesh system. This is how it’s actually done in large offices or public Wi-Fi networks. Wired Ethernet backhaul means that each access point (AP) is directly wired to the network with an Ethernet cable. There is then some centralised controller software which manages the network, allowing for seamless roaming between APs.
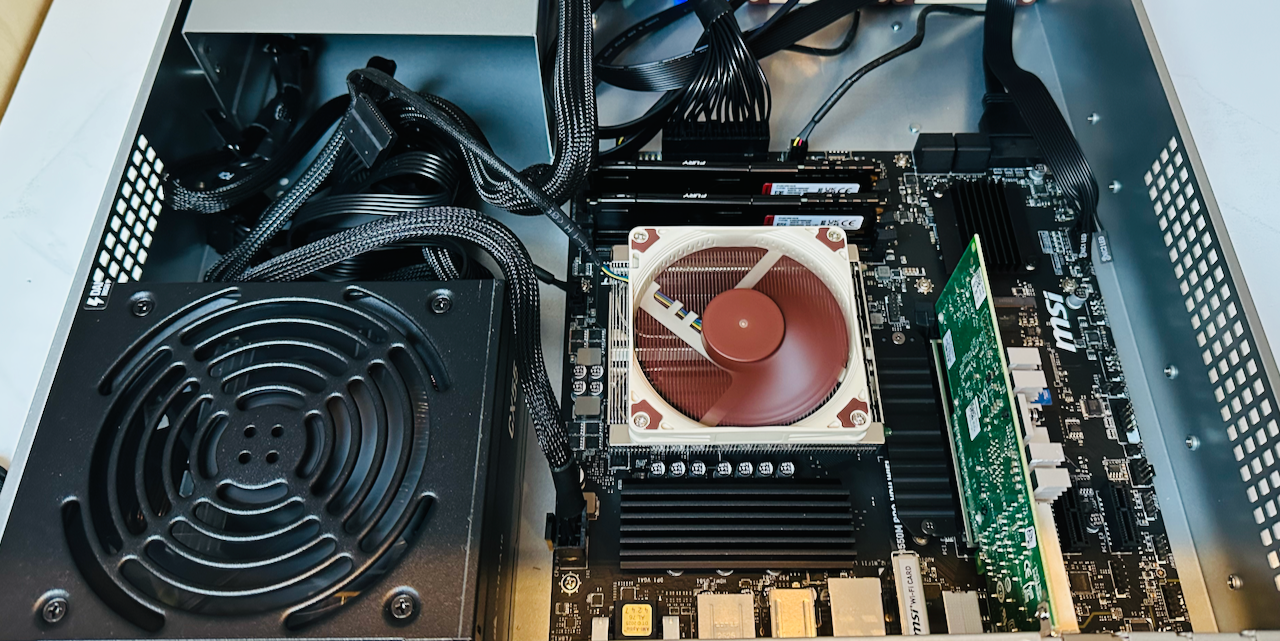
If you spend a bit of time reading about APs, you will definitely read about Ubiquiti and their UniFi range. It seems like they are positioned as the Apple of home networking equipment: everything is very nicely designed, with a “just works” experience on top of a “prosumer” level of configurability and features. Most people pair their UniFi APs with one of their “cloud gateways”, which are designed to replace your ISP router and provide much better firewall options and configurability, as well as hosting the controller application for the Wi-Fi mesh network. Because I wanted to build my own router (see some later posts for lots of details on that), I needed to find a way to host the controller application myself.
After quite a bit of research I settled on three UniFi U6+ APs. Three seemed like it would be enough to cover my house, garden and office (two in the house, one in the office), and I figured if I needed more I could always buy more. Crucially, these models support Power over Ethernet (PoE), meaning they can get their power and network from a single ethernet cable, making it all a lot neater. They’re designed to be ceiling-mounted, but they work well enough and look decent enough just sitting around the house.
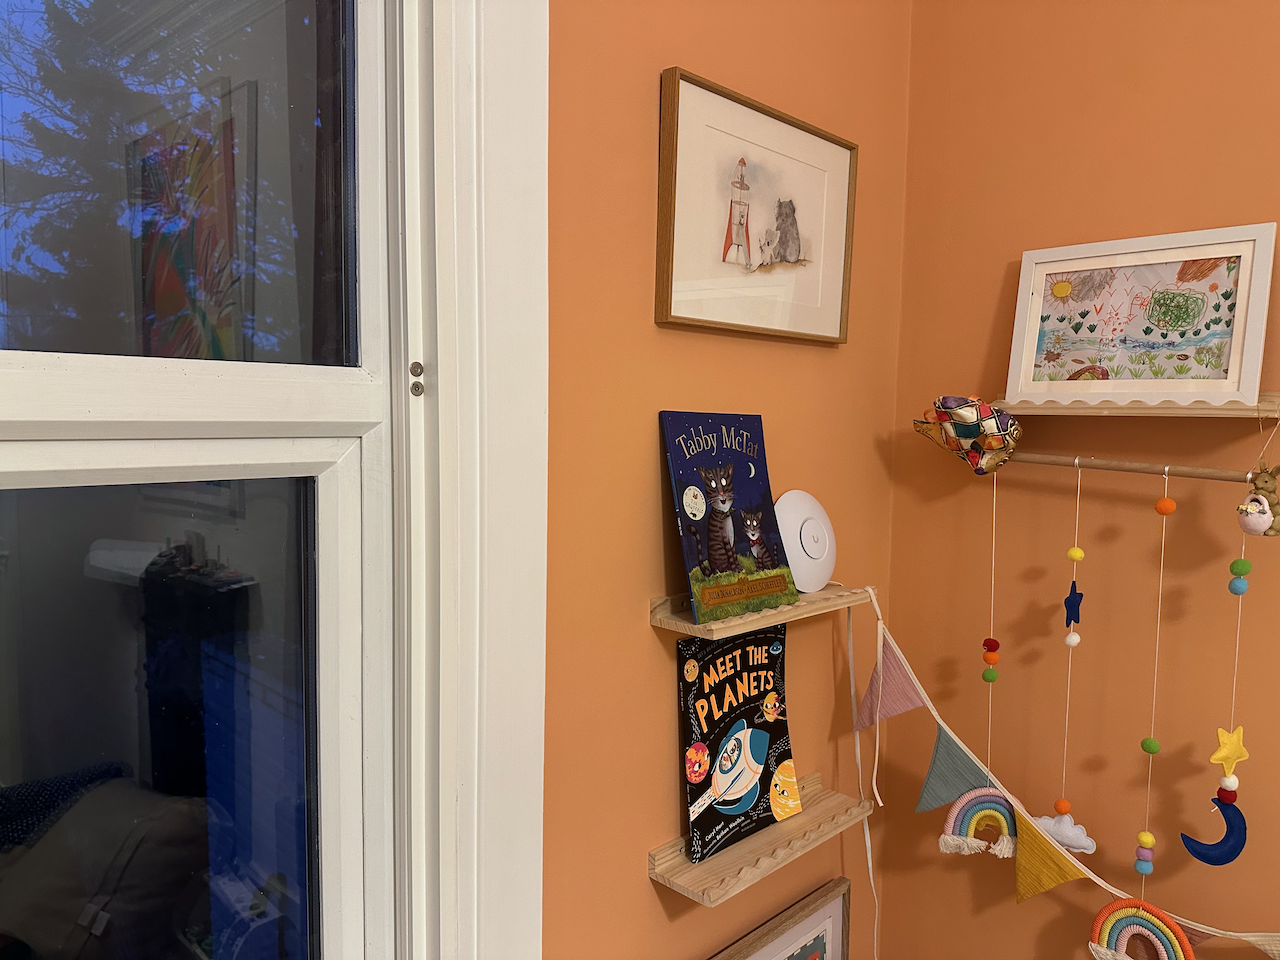
I was very lucky that the person we bought the house from had wired Ethernet to two important locations. There’s a “drop” going from one of the upstairs bedrooms (in the picture above) down into the cupboard in the living room which has become a designated networking cupboard, with two cables terminated in nice sockets in the wall. So I could just plug an AP directly into the wall with a single ethernet cable and it works, provided the other end of that cable is connected to a PoE-capable switch, which I also had to buy. I added another AP downstairs plugged directly into the switch.
The biggest gift of all the previous owners left us with is a CAT6 cable buried in a trench in the garden which connects the home office to the networking cupboard. Another, smaller PoE switch in the home office then allowed me to install the final AP there. I’ll say a bit more about the specific switches I chose in the next post.
My final step was to install the UniFi controller app. As I mentioned above, it was important for me to be able to self-host it rather than get locked into a UniFi gateway. It was actually very straightforward to run through Docker on my Synology NAS, which is connected via Ethernet to the same network as the APs. Once the container was running, I just logged in, set it up using the wizard, and then “adopted” the APs and I was done!

The only minor snag I hit was quite educational. When I was debugging one of the APs not adopting properly, I noticed it was receiving a strange IP address that was not the default one it shipped with. It took me a good hour to figure out that my Hive hub was running its own DHCP server and handing out a different IP address to the AP, making it undiscoverable at its default IP. Once I turned the Hive hub off everything worked fine, and once the AP was adopted I just turned it back on again. This was a good introduction to DHCP for me, as well as some network diagnostic tools that I ended up using much more heavily as I headed deeper down the rabbit hole.
My next step was a complete redesign of my home network and replacing the ISP router with a custom build, you can read about that here.